Scale 9 is a very useful concept in Adobe Flex for the UI develpers. But the first question is What is SCALE 9?
The designers or developers who have already used css for expanding button in their XHTML pages should feel familiar with the concept. In flex the buttons always expand according to the label text of the buttons. Lets see an example
This is the default setting of flex. Even we can add css in this button without any problem.
Button {
fillColors: #990000, #990066, #ffffff, #eeeeee;
color: #ffffff;
}
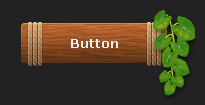
But what will happen if client wants a button with uneven shape or a button only with a image? Lets see an example to make it clear.
Looks good, but what will happen if we have a button with a large text? something like this
Ughh !!! It is looking streched and pixeleted and UGLY 😦
So whats the solution? If you have a large site or a large application it is not possible to have separate images for each button. Then ….
Answer is SCALE 9
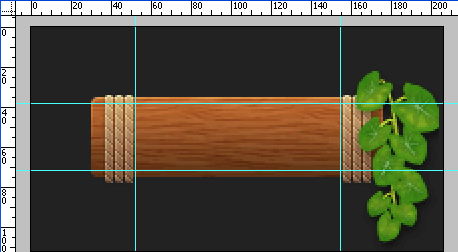
Please open photoshop, open your button image. Go to view> rulers. Place the rulers like this on the button image
with the help of the info panel check the co-ordinate of the four intersecting points. My info panel is showing top- 38 pixels, left- 52 pixels, right-155px and bottom 71px
Now I shall them in css in flex .I am giving the css for all the four states so that image can be different in all the four states according to design. You just need to change the name of the images in different state.
Button
{
disabledSkin: Embed(source=”assets/style_btn.gif”,scaleGridTop=”38″,scaleGridLeft=”52″,scaleGridRight=”155″,scaleGridBottom=”71″);
downSkin: Embed(source=”assets/style_btn.gif”,scaleGridLeft=”52″,scaleGridTop=”38″,scaleGridRight=”155″,scaleGridBottom=”71″);
overSkin: Embed(source=”assets/style_btn.gif”,scaleGridLeft=”52″,scaleGridTop=”38″,scaleGridRight=”155″,scaleGridBottom=”71″);
upSkin: Embed(source=”assets/style_btn.gif”,scaleGridLeft=”52″,scaleGridTop=”38″,scaleGridRight=”155″,scaleGridBottom=”71″);
color: #eeeeee;
paddingLeft: 80;
paddingRight: 80;
}
Now watch the result
Wooow !! Its looking good. No pixelation , no streched image, happy designer, happy project manager and above all happy client :).
Hope this post will be useful . Enjoy reading.


